How to Print a Japan Post International Parcel Label
The Japan Post International Parcel Label is a document that contains crucial information about the sender, recipient, and contents of a package.
The label is required for all international shipments sent from Japan Post, helping to ensure that packages are delivered to the correct destination and comply with customs regulations.
Japan Post no longer accepts handwritten labels for international destinations, so if you want to ship anything overseas, you'll need to familiarize yourself with how to create this label.
Step-by-step how to fill out and print the international parcel label
Pre-step: Create an account on Japan Post's International Mail My Page Service.
Go to Japan Post's International Mail My Page service and register your personal information to create an account.

Select either Individual customer or Corporate customer to get started.
Complete the temporary registration by filling out the fields.
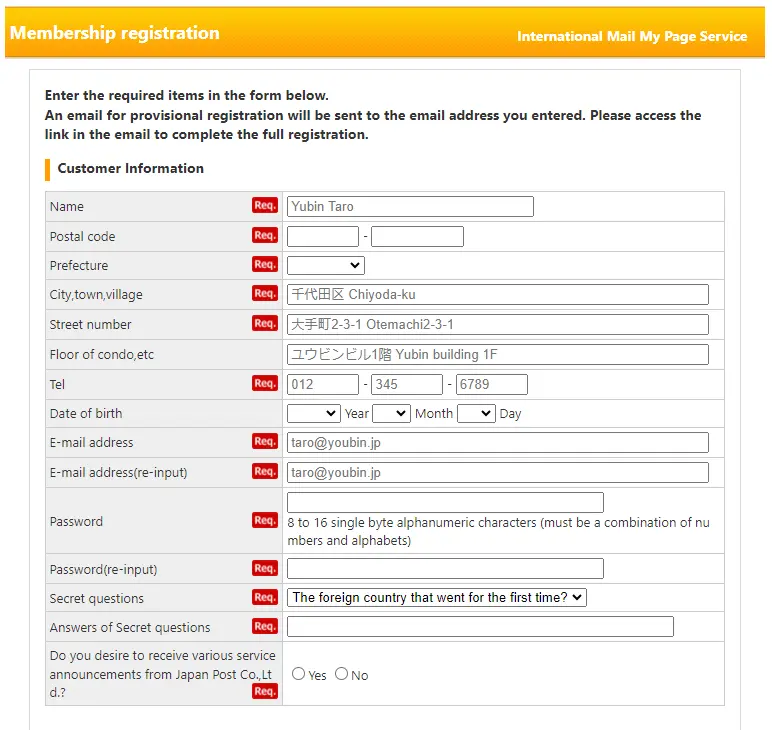
Then, complete the final registration following the instructions in the email sent to your registered email address.
Once you've registered your information and created an account, you can create and print an international parcel label.
Step 1: Register sender information.
Once you have completed the pre-step and confirmed your email address. Log back into International Mail My Service, and click on Create New Labels.
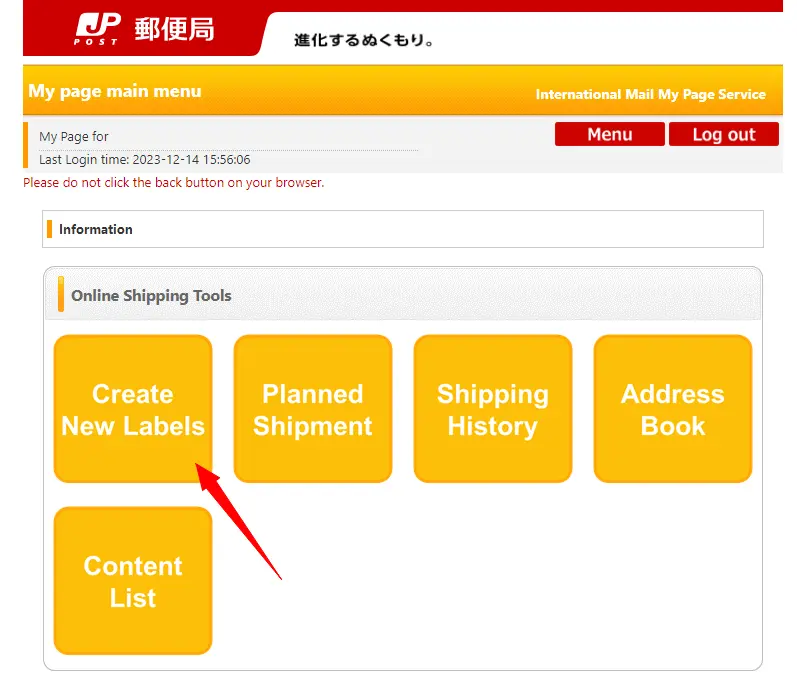
You will see the following screen.
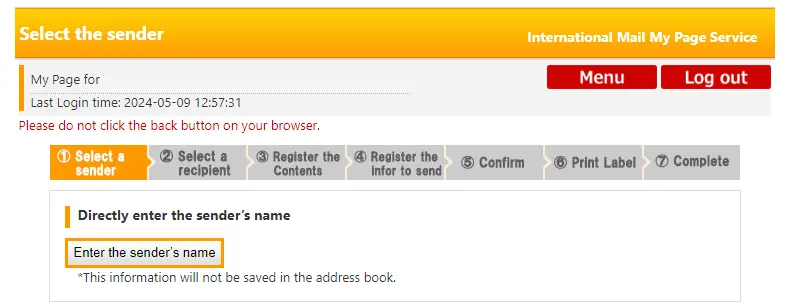
Click on Enter the sender’s address button. And input the information in half-width characters and numbers following the instructions on the screen.
The information you input is shown in the Select from the address book section.
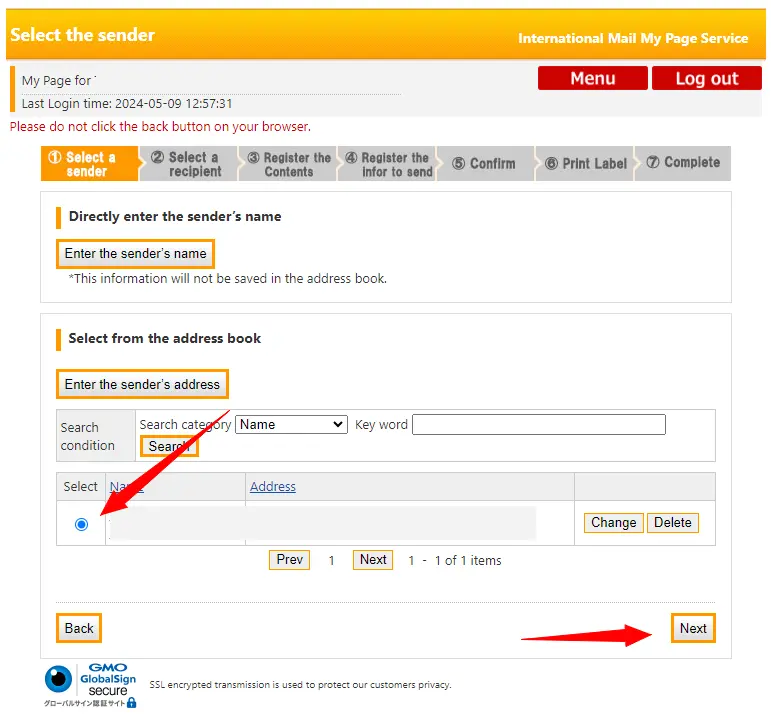
Select the Sender you just entered and then click on Next.
Step 2: Register the recipient's information.
In the Select a recipient screen, click on Add a recipient’s address.
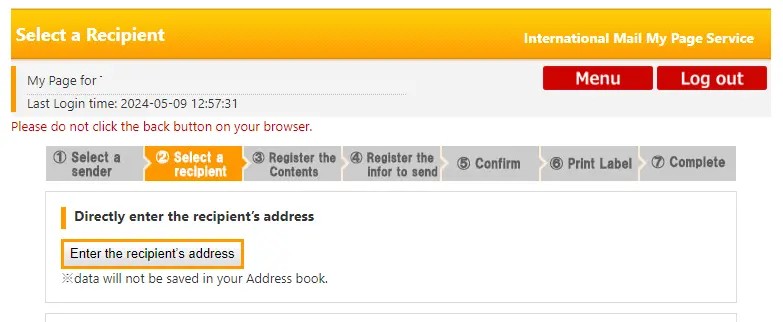
Input the information in half-width characters and numbers following the instructions on the screen.
Please note that you can only send postal items with shipping labels when you select the correct country/territory name.
Scroll down to Select from the address book section, and select the recipient you have just entered.

Click on Next.
Step 3: Register shipping service and content details.
Select the mailing service that you wish to use.
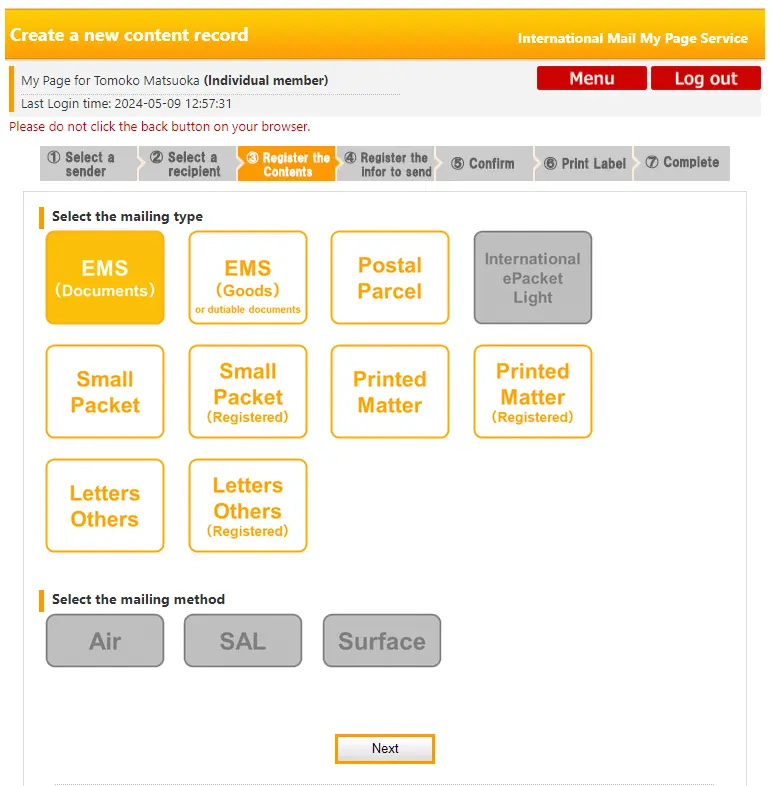
EMS is an express mail service and provides the fastest shipping, followed by Airmail, and Surface provides the slowest mail delivery. Check out this article for Japan Post's international parcel rates.
Once you’ve chosen the service you will use, input the Content name, Unit price, and Quantity. Then, click on Add.
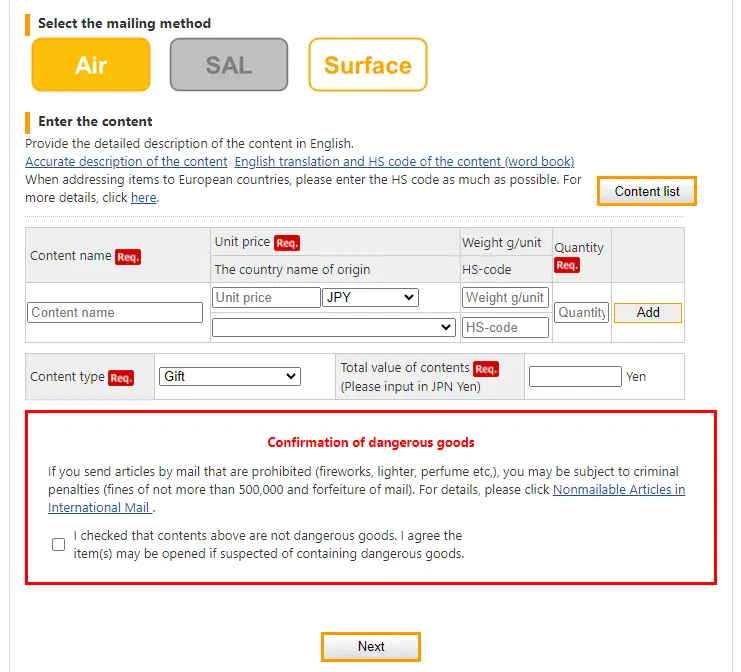
If you are mailing more than one item inside your parcel, click Add again to add further items.
Agree to the Confirmation of dangerous goods. Then click on Next.
Step 4: Register shipping information.
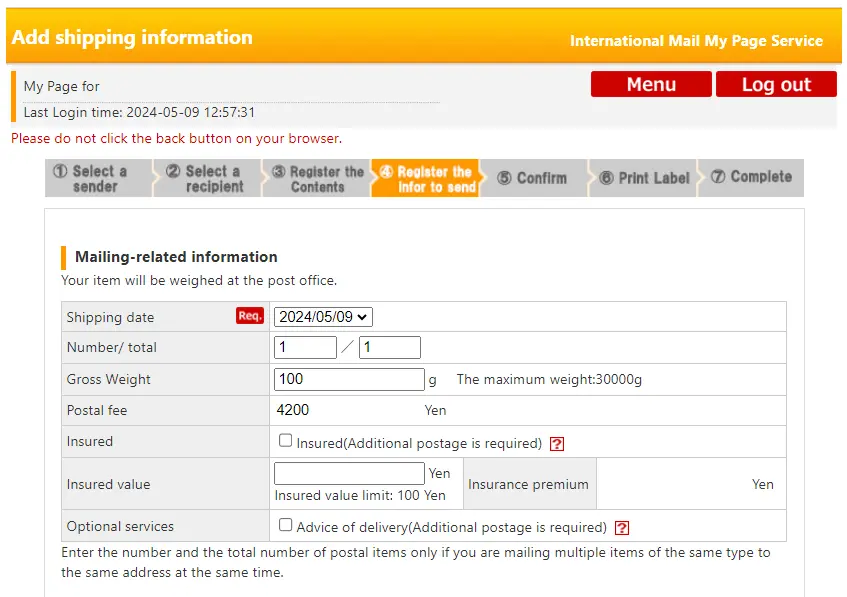
Input the Shipping date. You can select a date up to one week later, including today’s date. In principle, please send the item on the registered shipping date.
Input the Gross Weight. This information is sent as Electronic Advance Data (EAD). Please input the weight as precisely as possible.
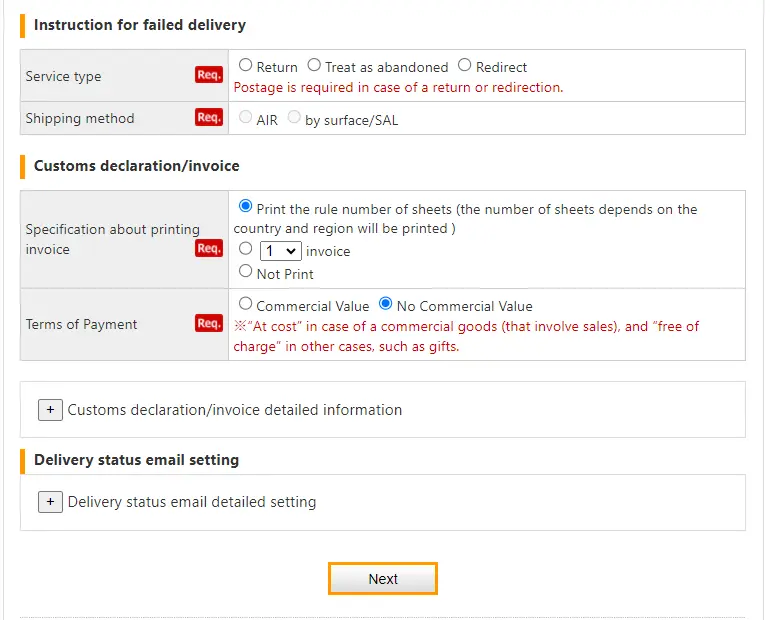
Fill out the rest of the fields.
Step 5: Confirm details.
On this screen, you will be shown the information you have inputted up to now. If you want to go back and change anything, click on the Modify the content button; it will take you to the previous page.
Once you have filled in your information correctly, scroll to the bottom of the screen and click on Register Shipment.
Step 6: Print the label.
If you are using Internet Explorer, hover the mouse over the label and click the printer icon. If you are using Google Chrome, click the printer icon on the right-top of the label.
Step 7: All done!
Sign the document and cut out the label, referring to the instructions on the screen. Then, hand in the document, along with your parcel, to a post office service counter. The post office will place the document in a clear plastic pouch and affix it to your parcel. You will then pay for the shipment at the post office counter.
Postage and payment
Calculating postage fees
Japan Post offers three international parcel services: EMS, AIR, and SAL. EMS is the fastest and most reliable service, while AIR and SAL are more economical but may take longer to arrive. The cost of each service varies, so be sure to check the rates to find the best option for your needs.
Payment methods
Japan Post offers several payment methods for international parcel shipping. You can pay for your shipment at the post office using cash, credit card, or debit card. If you are a frequent shipper, Japan Post also offers a prepaid card for paying for your shipments. The prepaid card can be loaded with a specific amount of money, and you can use it to pay for postage at the post office or online. This is a convenient option for those who frequently ship parcels internationally.
Frequently asked questions
What is the process for filling out a Japan Post international shipping label?
The Japan Post international shipping label requires the sender to fill out the name and address of the sender, the name and address of the recipient, and a description of the contents. The label must be affixed to the parcel in a clear plastic sleeve, which can be obtained at any Japan Post office. For more detailed instructions, customers can refer to the Japan Post website.
Where can I find the Japan Post international parcel rates?
Check out this article for Japan Post's international parcel rates. Rates are determined by the weight and destination of the parcel. There are also different rates for airmail and surface mail. Customers can also use the online rate calculator on Japan Post to estimate the cost of shipping their parcel.
👉 Use our Japan Postal Codes tool to help you find the postal codes for places throughout Japan!
In closing
If you plan on shipping anything overseas via Japan Post, the Japan Post International Parcel Label must be filled out accurately and completely to avoid delays or returns. Use this guide to help you get your item labeled, shipped, and on its way!
Spending too long figuring out your Japanese mail?
Virtual mail + translation services start at 3800 per month. 30-day money-back guarantee.