9 Common Paperwork Mistakes to Avoid in Japan

Nobody loves paperwork. But learning a couple of dos and don’ts could help you hate it less. Make life easier for yourself by reviewing these 9 common paperwork mistakes that foreigners—and even Japanese—frequently make.
Filling in paperwork is a large part of living, working, and doing business in Japan. The current administration aims to move many of these procedures online. However, while we wait for that lovely day, there remain numerous procedures at your local city office, the bank, the post office, etc., that still require you to flex your paperwork muscles.
One thing you’ll learn soon enough—if you haven’t already—one small inconsistency or error, and you will be asked to resubmit your application or form. Prevent that from happening by studying up on these easy-to-make mistakes so that you can avoid time-consuming do-overs.
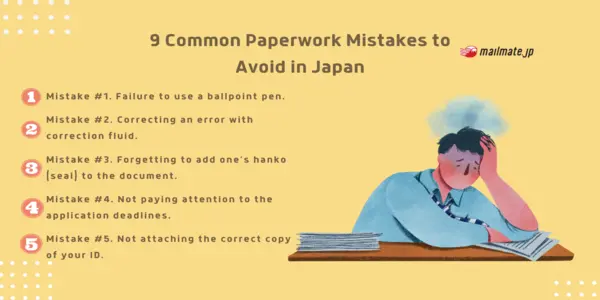
Mistake #1. Failure to use a ballpoint pen.
You did everything perfectly—but you used a pencil or a colored ballpoint pen. The standard writing instrument is the humble ballpoint pen in black. Black fountain pens are also permitted. Avoid using pencils, color pencils, and other-colored ballpoint pens.
Mistake #2. Correcting an error with correction fluid.
Ooops. You made a mistake. What do you do next? Did you reach for some white correction fluid or white correction tape? The correct way to fix a mistake is to strikethrough the error twice. And then, in whatever space remains, write out the correct text. If you have made multiple errors, it might be best to request a fresh copy.
Mistake #3. Forgetting to add one’s hanko (seal) to the document.
This will hopefully be less of an issue in the future, as the current government is moving toward eliminating many of the previous uses of hanko. But there are still occasions where your hanko will be required, particularly if you are a business owner in Japan. Double-check whether your seal is required in the paperwork you are filling out.
Mistake #4. Not paying attention to the application deadlines.
If there’s a date attached to your application—and when it must be filed by—that mail-by date is not a suggestion. It’s unfair to say that your local city office is filled with paper-pushers ready to pounce, but it will certainly feel this way when you get your application returned to you because you did not heed mail-by dates.
Mistake #5. Not attaching the correct copy of your ID.
Things are getting simpler in this aspect, as using a My Number card (Japan’s 12-digit ID system, implemented in 2015) has helped streamline ID verification. In the past, common mistakes included using the My Number notification slip when a My Number card was requested. Or attaching a copy of only one ID when two or three forms of ID verification were desired.
Mistake #6. Writing one’s given name first.
In the US, Europe, and many other countries, one’s given name is written first and the surname comes second. In Japan, that is reversed. The surname is written first on applications, with the second space reserved for the given name. Previously, one was allowed to reverse the Surname Name/Given Name order when filling in applications in English but this was recently amended to require the traditional Japanese name convention, even when filling out an application in English.
Mistake #7. Not knowing the Japanese calendar system.
The Japanese calendar system uses era names to denote calendar years. New era names are given at the start of a new emperor’s reign. When Emperor Naruhito ascended on May 1, 2019, that marked the beginning of the Reiwa era. This year, 2021, is Reiwa year 3. The majority of paperwork here in Japan will ask you to fill in the date of your application, as well as your birthdate, using the Japanese calendar system. The chart on this site will show you the Japanese era year in which you were born. Copy that info down. You’ll likely need it again soon.
Mistake #8. Using a non-standard or outdated photo.
When asked to attach a photo ID to complete an application, typically, this means sending in a photo ID taken within the last 6 months. The guidelines for how you should appear are as strict as any passport photo you’ve taken in the past. For example, no sunglasses, hats, or hairstyles that obscure the face. Taking a picture with your phone will likely cast a shadow that could be problematic. The safest bet is to get your photo taken via a passport photo booth. The cost is between ¥800 to ¥1000 for a set of four pictures. See this guide from the My Number site for standard guidelines for ID photos.
Mistake #9. Not sending in the requested attachments.
This mistake is equivalent to sending an email that says, “See the attached file,” and forgetting to attach the file. The missed items are often a copy of an ID or additional forms requested to complete your application. Whatever the case, make sure to double-check that you’ve attached whatever has been requested.
In summary, review the following points before filling out your next piece of paperwork and you’ll have a higher chance of eliminating pesky errors!
Use a black ballpoint pen.
Correct an error with a double strikethrough line.
Add your seal to the document (if requested).
Pay attention to the application deadlines.
Check what type of ID verification is being requested.
Write your surname first, given name second.
Know the Japanese era year in which you were born.
Adhere to guidelines when sending in a photo ID.
Double-check that you’ve included all requested attachments.
A final note: While the above list provides generalized guidance, there’s a chance you’ll find the one city office or procedure that does things slightly differently.
Spending too long figuring out your Japanese mail?
Virtual mail + translation services start at 3800 per month. 30-day money-back guarantee.